

Sublyric Interface Explained: The Three Workspaces Every Beginner Should Know
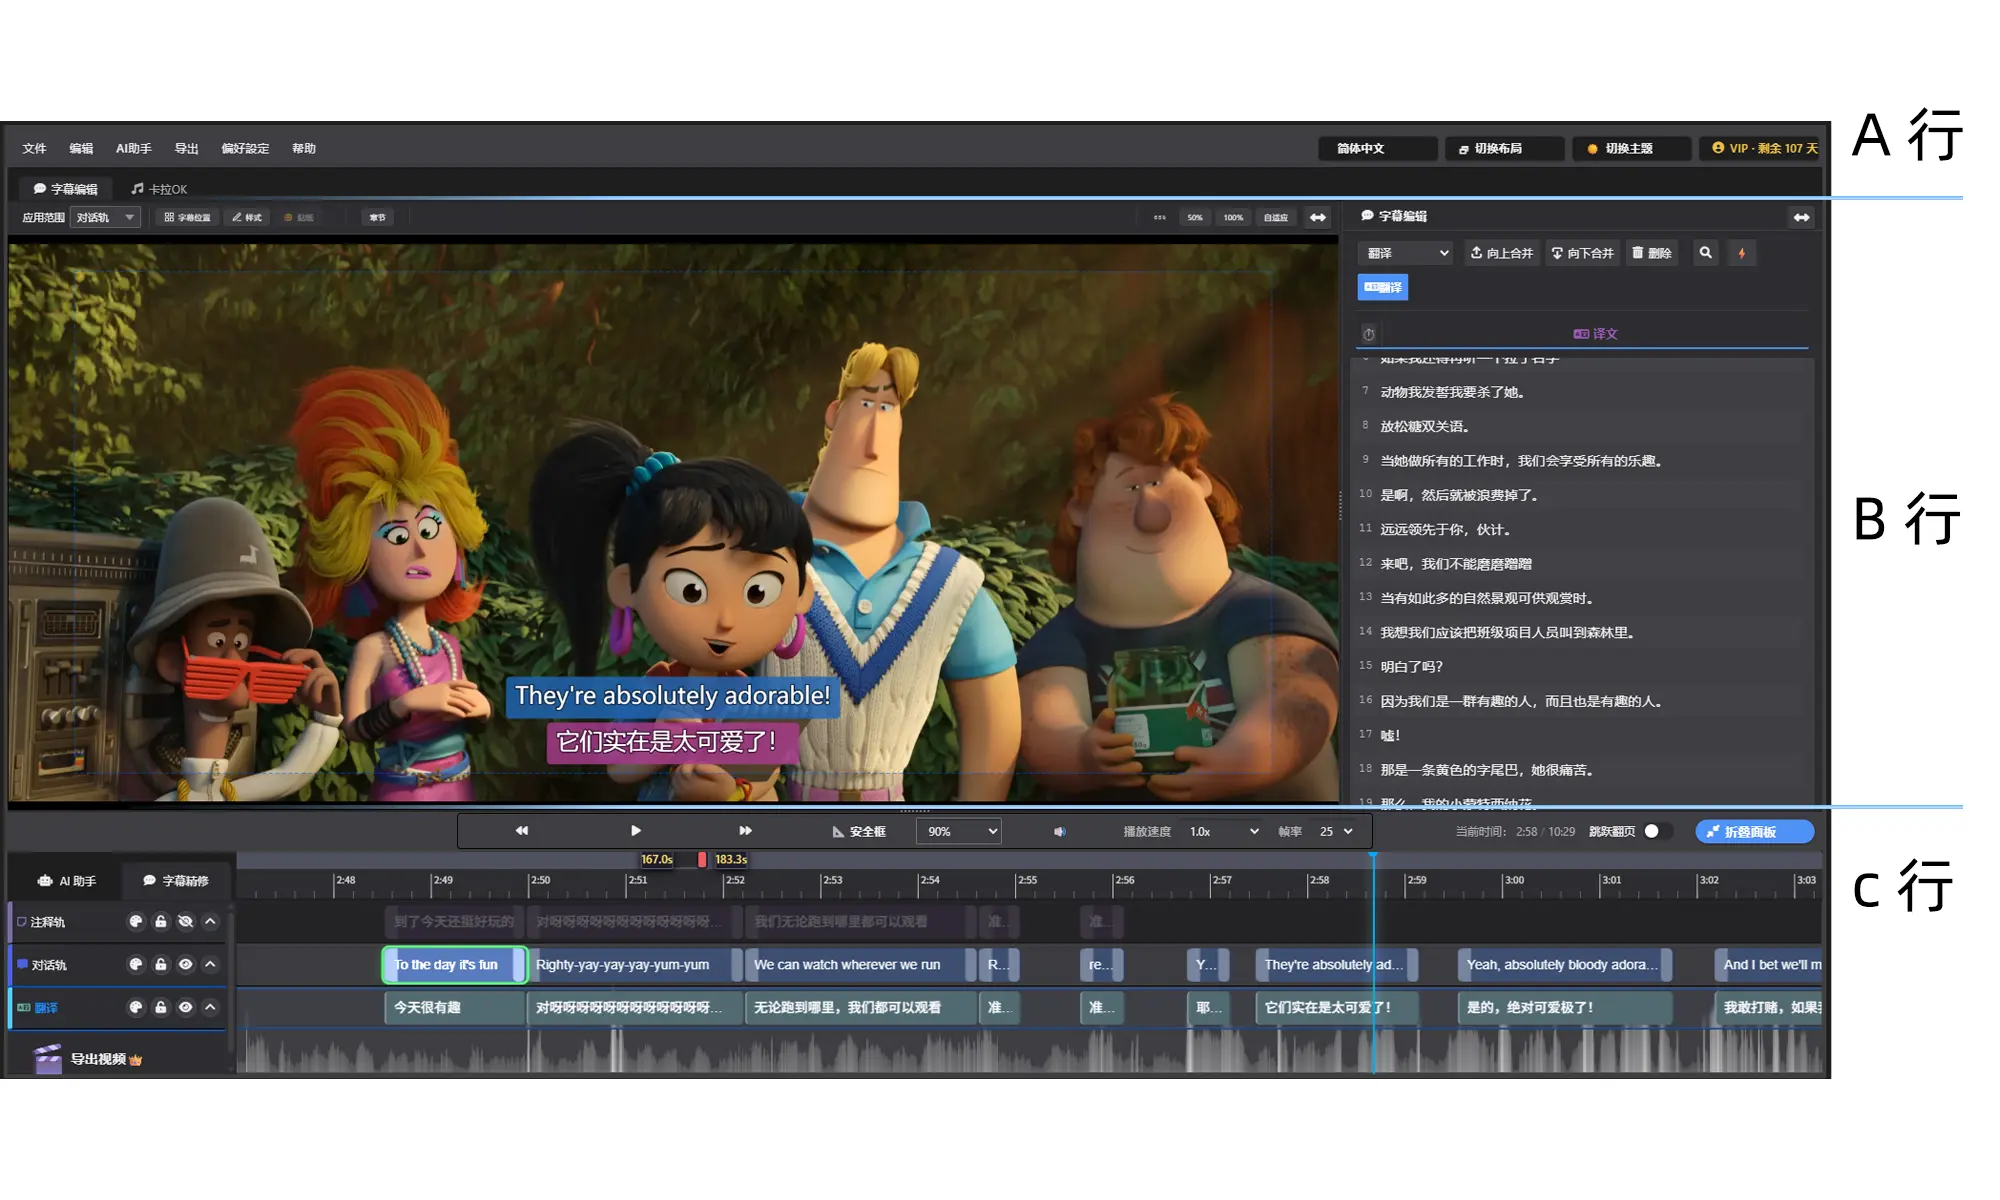
When you open Sublyric, the window is split into three horizontal rows from top to bottom: Row A, Row B, and Row C. Learn these three rows and you've got the whole app mapped out.
Row A (Top): Menu Bar + Mode Switcher
The menu bar runs across the very top. From left to right: File, Edit, AI Assistant, Export, Preferences, and Help.
Just below it is the global mode switcher, with two tabs. "Subtitle Editing" is the default; click the "Karaoke" tab to switch to karaoke mode. Every tutorial in this series uses these two modes, so make a note of where they are.
The top-right corner has four handy shortcut buttons: switch language, switch layout, toggle theme (🌙/☀️), and sign up / log in.

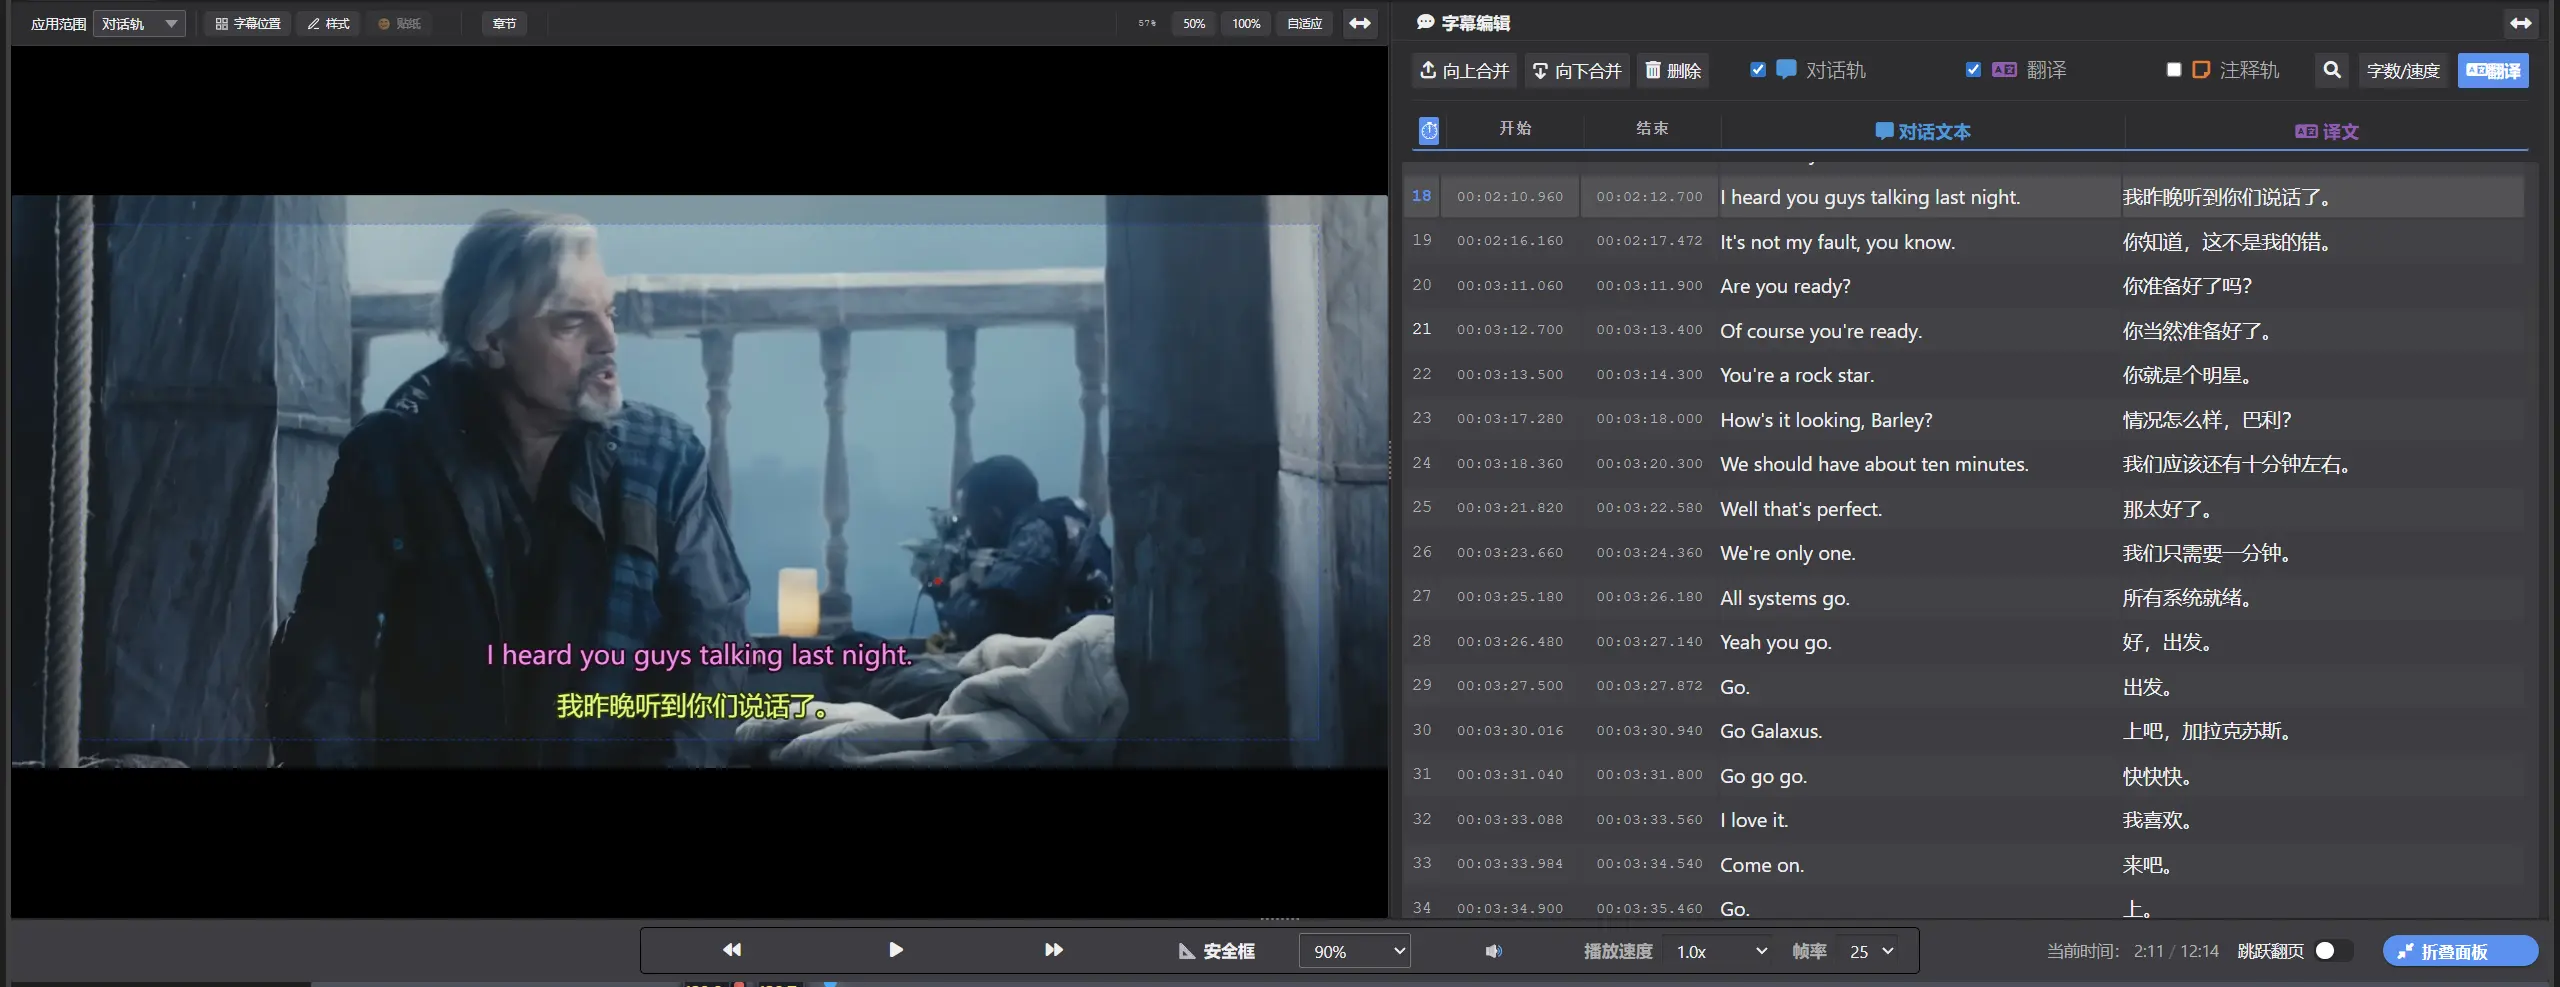
Row B (Middle): Video Preview + Subtitle List
This is your main workspace:
- On the left is the video preview. Subtitles and lyrics render over the video in real time, so what you see is what you get.
- On the right is the subtitle/lyrics list, which shows every subtitle entry in a table.
Drag the divider between them to adjust their widths. Each panel also has a maximize button in its top-right corner, which comes in handy when you want to focus on just the list or just the video.
Along the top of the preview is a toolbar with three groups of features: Subtitle Style (position, style, stickers), Chapter Management, and View Zoom. We'll cover these in detail in later tutorials.
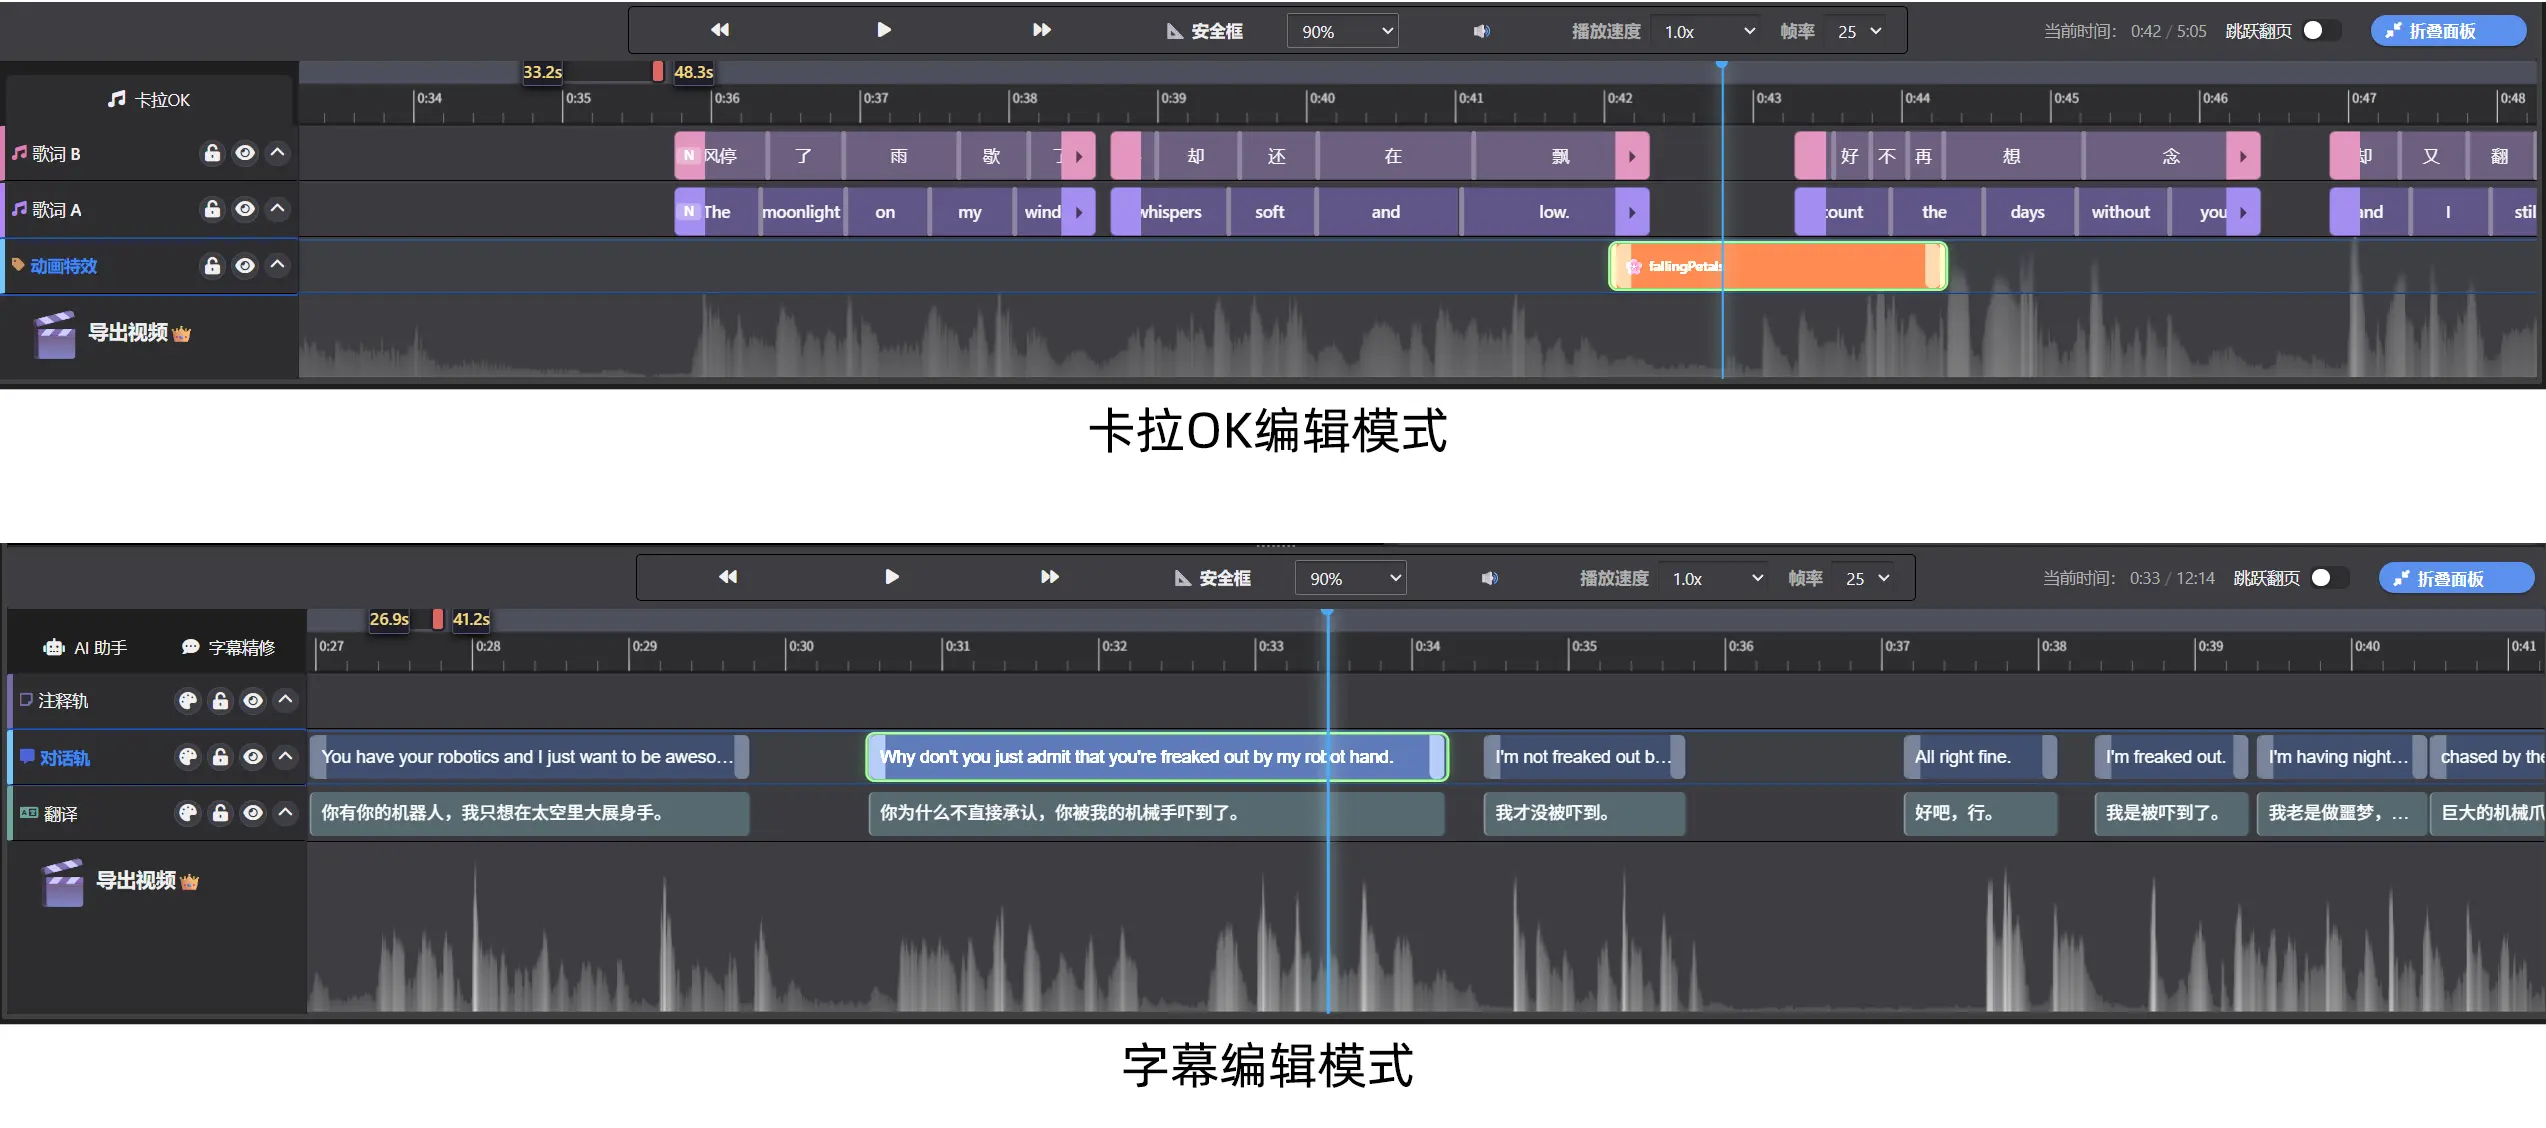
Row C (Bottom): Timeline View
This is where you fine-tune subtitle timing. The upper part is a toolbar with playback controls, frame rate, speed, and more. The lower part is the track area:
- On the left is the track control panel. Each track has icons for style (palette), lock, visibility, and collapse/expand.
- On the right is the track view. Subtitle Editing mode has three tracks: Dialogue (blue), Translation (blue-gray), and Notes (dark purple). Karaoke mode has Lyrics Track A, Lyrics Track B (green), and the Marker track (yellow).
The audio waveform shows up as gray ripples behind the tracks. Lining up subtitles with the waveform is the key to getting timing right.
💡 Tips
- Hold Alt and scroll the mouse wheel to change the waveform height.
- Zoom into the timeline until you can see individual frames, then drag subtitle edges to line them up frame by frame.
FAQ
Q: What's the difference between Subtitle Editing mode and Karaoke mode? A: Subtitle Editing mode is for regular subtitles and uses the Dialogue (blue), Translation (blue-gray), and Notes (dark purple) tracks. Karaoke mode uses Lyrics Track A/B and animation effects to create word-by-word highlighted lyrics. Switch between them with one click in the global mode switcher at the top.
Q: Can I resize the video preview and subtitle list? A: Yes. Drag the divider in the middle of Row B to adjust their widths. Each panel also has a maximize button in its top-right corner if you want it full width for a while.
Next Step
Now that you know your way around, it's time for the fun part: turning your video's speech into subtitles with one click using AI.
👉 Next: How to Generate Subtitles for a Video with One Click Using AI